Painted Fabric Pillows: Stamping How to (Post 1 of 2)

In this post I will detail how to:
1. Use a kitchen sponge and fabric paint to make a pillow
2. Use embellishments to jazz up a pillow
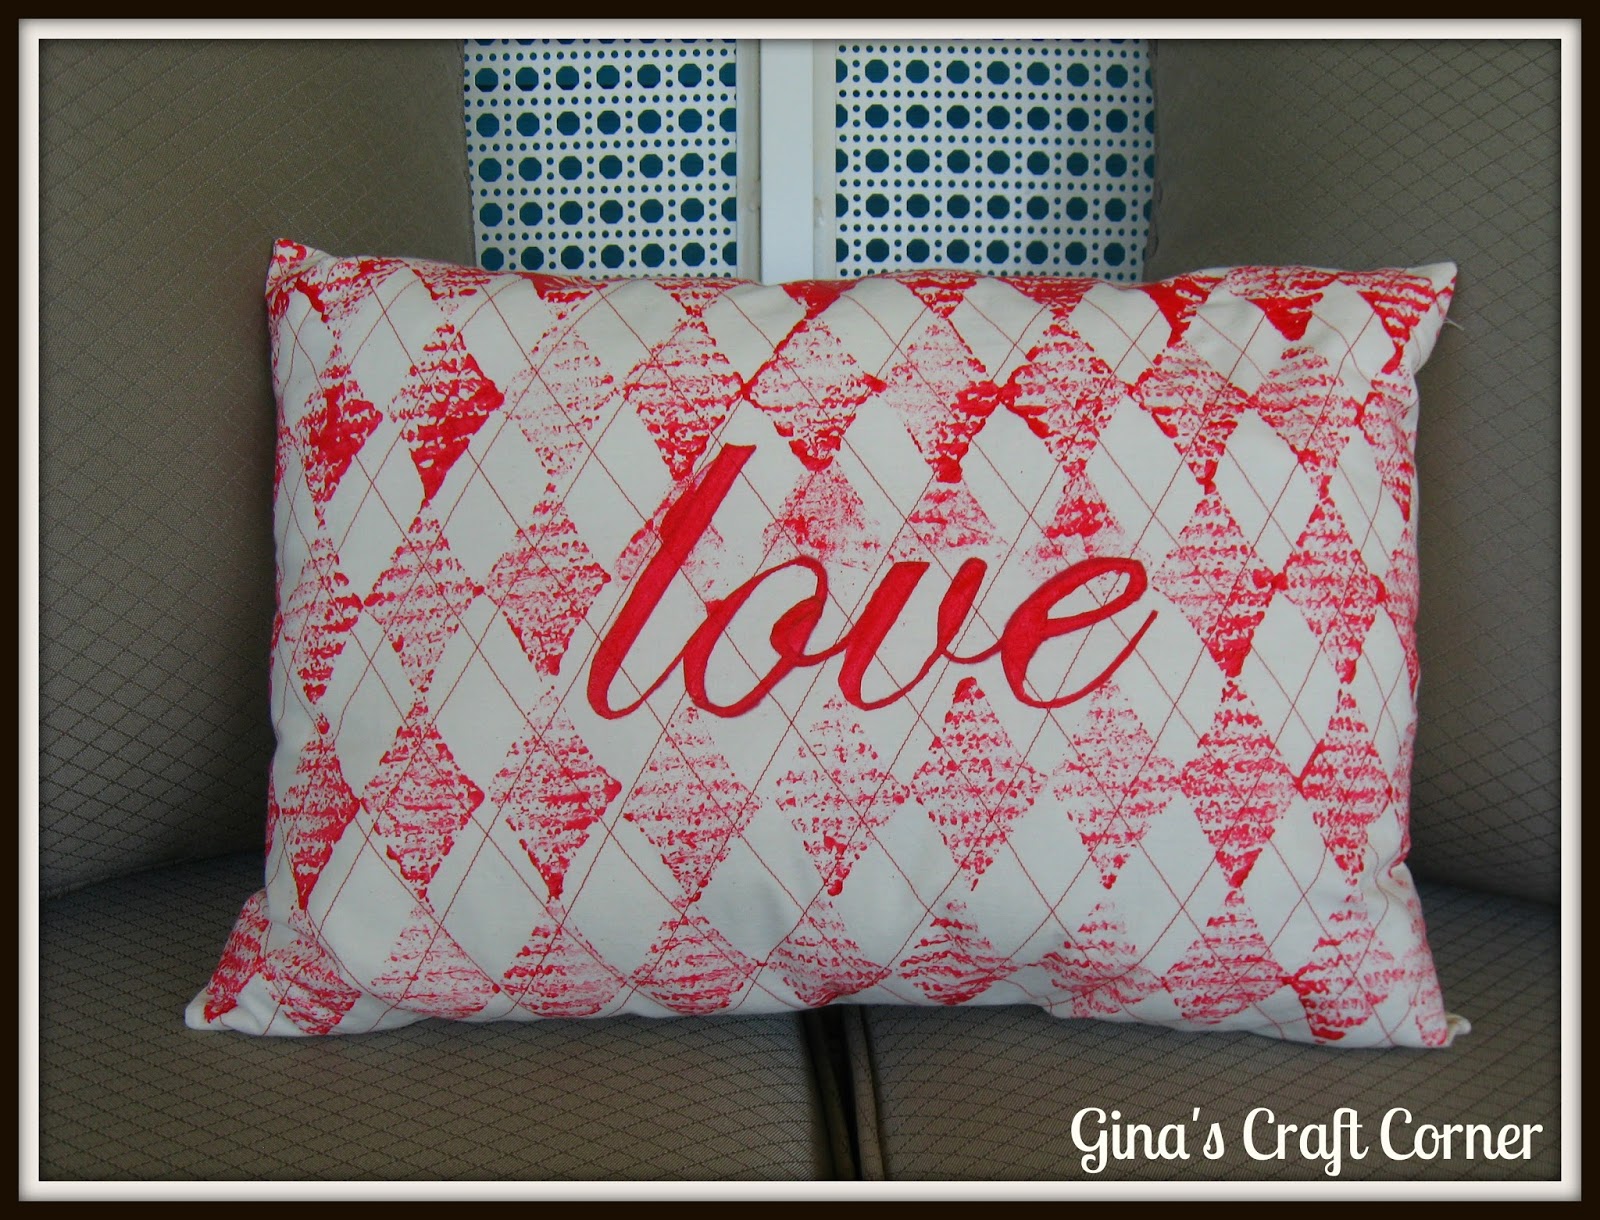
If you are interested in the pillow, on the left in the above picture, I describe how I made it in the post titled, Custom Design a Pillow with String and Paint. In the post I'm writing today, I will focus on the 'love' pillow in the middle and the 'embellished pillow' on the right.

- Two 16" x 24" pieces of cotton fabric (choose your color)
- Cellulose Sponge (kitchen sponge)
- 'love' stencil (or word of choice)
- Fabric Paint
- Sponge Paint brush for wording
- Sharpie
- Matching or Contrasting Thread
- Sewing Machine
1. Cut sponge to desired shape. I like using this type of sponge with the rough backing b/c it gives you something to hold on to. If your sponge does not have this, you can attach a piece of wood or cardboard to your piece.

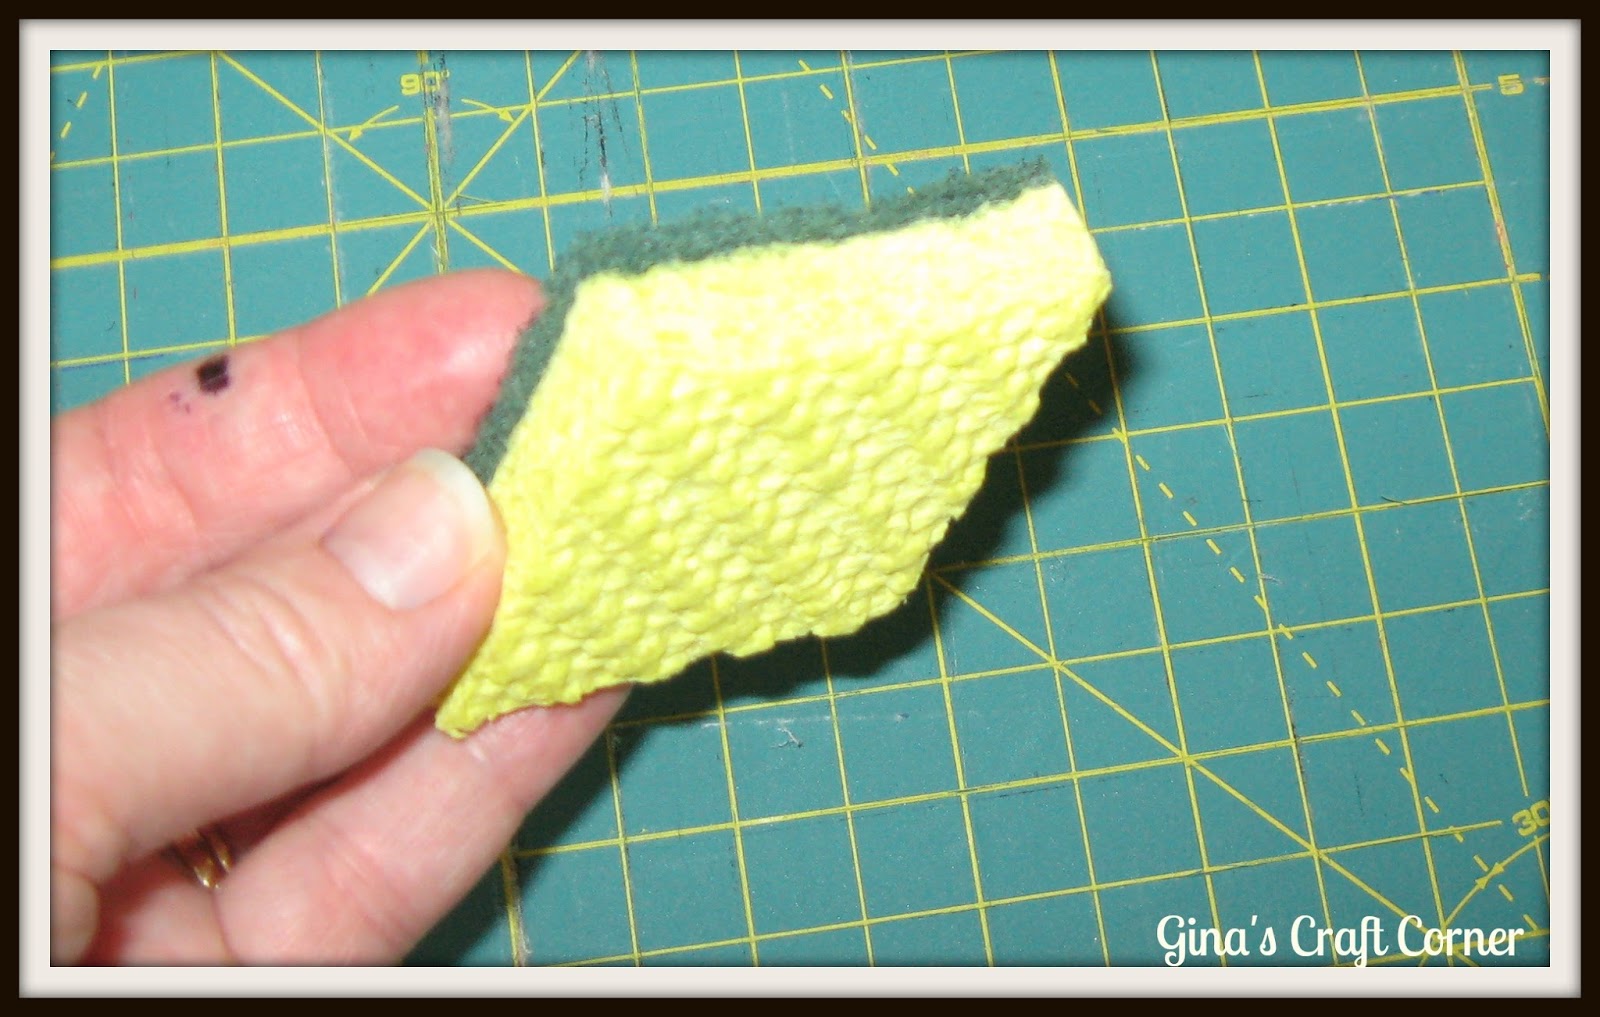

I then took my new handy dandy precision knife set (thanks Dad!) and cut around the lettering. This was time consuming and not fun, but I survived. Make sure you cut on a self-healing cutting mat or some other surface (thick cardboard/ cutting board).


NOTE: I also tried another method on a smaller piece of fabric. I placed my fabric up to the computer screen and traced over the lettering.


5. Dip your sponge stamp in the paint and start stamping. I used my sample fabric (above) to practice a little. I still got a little too much paint on my sponge in the beginning. I started to dip and then I would dab on a cloth to remove the excess and then stamp on my fabric. This seemed to work well.


6. Allow your paint to dry (my bottle said that I could wash the fabric after 72 hours). I did not wash my fabric. Once it was dry I moved on to the next step.
7. If you want you can then add some decorative stitching to your pillow. I chose to add some lines though the diamonds in one direction and then again in the opposite direction.


8. The final step is to sew up the pillow. I'm sorry I did not take pictures of this step. Sewing a pillow is very easy. Place the front and back of your fabric right sides together. Next, sew a 1" seam allowance along the sides and the top. When you get to the bottom of the fabric be sure to leave a 5" opening. You will turn you fabric through this opening right side out. Stuff your pillow and then hand sew up the 5" opening. I am getting better at closing pillows with each one I do. It's tricky! Especially, since I hate hand sewing. Is it just me, or does me hating hand sewing come up in every post! :)


Thanks so much for stopping by! I would love it if you would leave a comment so I can get to know you better. If you would like to follow Gina's Craft Corner you can find the purple linking buttons up by my picture! :)
Many blessings to you!!
~Gina
If you like to design your own fabric, you might also like these post...


This post was featured here..

I'll be linking up to some of THESE great parties!


Comments
Post a Comment
I LOVE..LOVE...LOVE...comments from you! It truly makes my day! So, leave a comment AND your webpage or social media link and I will get back with you. Thanks in advance!!
~Gina